What Is This?
Web Worksheet Wizard and Project Poster have combined to make Web Poster Wizard. This FREE tool allows educators to create a lesson, worksheet, or class page and immediately publish it online. Teachers can also set up classes and assign projects to students. Students complete the assignments by creating their own online projects or reports. Teachers and students can even add images and links to their pages.
Teacher Activities:
- Register and set up a class.
- Create a Worksheet.
- Allow students to make Posters if desired.
- View students’ Posters.
- Showcase exemplary work.
Student Activities:
- View teacher Worksheets.
- Use class code to create Posters.
Teacher Guide
You must first register to use Web Worksheet Wizard, but you only have to register once. If you already had an account in Web Worksheet Wizard, use that same information to log in.
Register and Log in
- Click the Register link or log in if you have already registered.
- To register, enter your personal information to create your account (We do not share your information with anyone).
- Click the Register Teacher button to finalize your account.

Create your class.
- Enter the class name under the Add A Class section.
- Click the Add Class button.
- The class will be added to the table and assigned a class code.

Create Teacher Worksheets
- Click the Manage icon in the table next to the class for which you would like to make a teacher Worksheet.

- Click the Create Worksheet button to make a new Worksheet.
- Read the directions and click the Next button.
- NOTE: You must always start here! Never use the browser's Back button once you get started. Only use the one provided in the tool itself. Otherwise you may accidentally create multiple copies of your unfinished worksheet or lose the work you have done so far.
- Enter a title for your Worksheet.
- Choose a Header and Sub Header layout by clicking on the radio button (small circle) below the format you like best.
- Choose a layout for your Body Text and Links by clicking on the radio button under the one you prefer.
- Click on the Next button at the bottom of the page.
- Enter a page heading which can be the same as your Worksheet title.
- Enter a sub header.
- Enter the body text of your page.
- Click the Next button at the bottom of the page.
- Add up to 16 links to your page by entering a link title and URL. Be sure that you do not enter multiple sets of http:// since it is already provided for you.
- If you would like to include an image it must be no larger than 350 pixels width and height. Use the Browse button to surf for the picture on your computer.
- Enter an image caption, especially if the image is copyrighted.
- Click the Next button at the bottom of the page.
- Select font styles for your Worksheet.
- Select color schemes for your Worksheet. You can choose a preset color scheme by using the drop-down menu and the Apply Scheme button. This ensures the colors of the text and links look good together. If you are more adventurous, you can also choose your own scheme by clicking on the colors you want for the different elements.
- Click Next button at the bottom of the page.
- The final page will list your Worksheet ID number, your unique URL, a link to view your finished Worksheet, and a link to edit it.

- Click the Finish button to return to the Teacher home page.
Edit or Delete Teacher Worksheets
- Click the Manage icon in the table next to the class for which you would like to edit a teacher Worksheet.

- On the following page, there are many options to help you edit your Worksheet.
- Under the Update Main Information section, you can click the links to either change the header, body layout or worksheet title or you can click the second link to change your fonts or colors.
- Under the Update Page Contents, you can change page order and update your body content or links and images. You can also view your Worksheet or delete it.
- Directly under the table, you can click the Add New Page link to add more pages to your Worksheet.

Directing Students to the Worksheets
- Students will need your Worksheet ID Number, Class Code, or last name to retrieve your Worksheets.
- To retrieve a Worksheet they should go to the home page of Web Poster Wizard. In the bottom right-hand corner there is a Search for Posters and Worksheets section. They can use the drop-down menu to select the item by which they would like to search. Then they need to enter the corresponding information in the text field. A click of the Search button will retrieve the results.

Assigning Student Posters
- If you would like to assign your students a poster, you will need to give them your Class Code.
- If you would like to make a handout for them, log in to your account and click the Manage icon in the table next to the class for which you would like to create a handout.

- Next, click the Manage Posters tab at the top of the page.

- Now, click the Print Class Handout button.
- Print the page and distribute it to the class.
- They will then need to go to the home page of Web Poster Wizard and create a new Poster. See the Student Guide for further help.
Reviewing and Managing Student Posters
- Once your students have created worksheets, you can locate them by logging into your account.
- Click the Manage icon in the table next to the class for which you would like to view student Posters.

- Next, click the Manage Posters tab at the top of the page.

- You will then see a table of student-created Posters. There are many options included in the table. You may view ID numbers, authors, project titles, images, revision dates, and deletion dates.
- You may also View, Edit, or Delete Posters.
- If a student forgets his or her password, you can use the Edit link to log in to the student’s account and change the password for him/her.
- Posters are kept for one month. If you would like to keep them longer or create a Teacher Feature, use the Archive button, which is in the shape of a suitcase. Archived Posters are kept for as long as you wish.
Creating a Teacher Feature
- You can quickly create a showcase of work done in Web Poster Wizard in order to share it with parents, staff, or other students. The Teacher Feature option allows you to quickly create a Web page that automatically links to:
- all the teacher Worksheets in one class
- all the student Posters in one class
- both Worksheets and Posters in one class
- To create a Teacher Feature, first log in to your account.
- Click the Manage icon in the table next to the class for which you would like to make a Teacher Feature.

- Next, click the Teacher Feature tab at the top of the page.

- Choose one of the options depending on what you wish to showcase. You can create a private page that is only for your use if you select the first option. Note that if you are creating a Teacher Feature of archived student Posters, you will want to archive the Posters before creating the page because only archived Posters will be automatically added to the Teacher Feature page.
- Once you have selected an option, you can select a background color for your page.
- Next, enter a Project Title, Subtitle, and Project Text.
- You may also upload an image and include an image title. Be sure to include where you acquired the photo.
- Click the Submit and Preview button.
- To view your Teacher Feature, click the Feature button, shaped like a magnifying glass.

- To edit a Teacher Feature, click the Manage button and the Teacher Feature tab. Make any updates you wish and click the Submit button when you are finished.
Student Guide
You can use this tool to locate and view your teacher’s worksheets or to create your own Posters to complete a teacher-assigned project.
Locating Your Teacher’s Worksheets
- You will need a Worksheet ID number, Class Code, or last name to retrieve your teacher’s Worksheets.
- To retrieve a Worksheet, go to the Web Poster Wizard home page. In the bottom right-hand corner there is a Search for Posters and Worksheets section. Use the drop-down menu to select how you would like to search. Then enter the corresponding information in the text field. Click the Search button to retrieve the results.
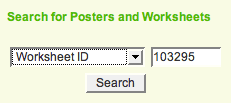
- Click the correct Worksheet on the results page to view it.
Creating Your Teacher-Assigned Poster
- On the home page of Web Poster Wizard, go to the Student Login section and click the Create a New Poster link.
- Read the directions and click the Next button.
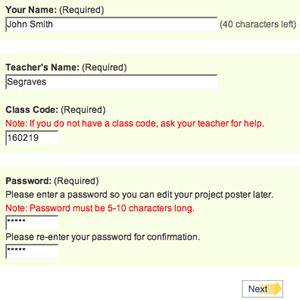
- Enter your name, your teacher’s name and your class code.
- Next, select the background you would like to use. You may select either plain or color. If you select a color background, you will have several choices.
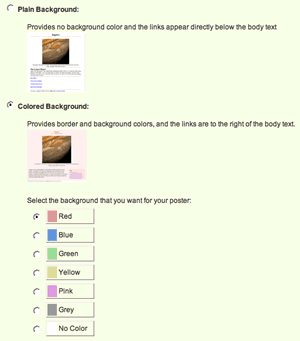
- Click the Next button.
- Enter a Project Title, Subtitle, and Project Text.
- Click the Next button.
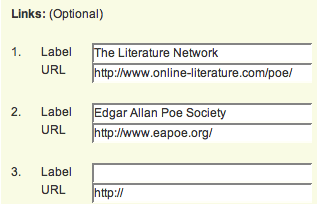
- You may enter up to 10 links. Be sure to enter both a Label and URL. We have already provided the http://.
- You may also upload a picture for your poster by clicking the Browse button and selecting the picture on your computer that you would like to upload.

- Enter an image title and the source of the image in the text fields.
- Click the Next button.
- Click the Finish button.
- The resulting page will list your Poster ID number, the URL of your Poster, and a link to view it. You will want to print this page or copy the ID number for future use.
Editing Your Poster
- To edit your Poster, go to the home page of Web Poster Wizard.
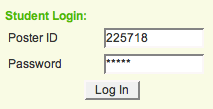
- In the Student Login box, enter your Poster ID number and your Password.
- Click the Log In button.
- On the following page, there are many options to help you edit your Poster.
- You can use the various links on the left side of the page to update your user information, update the layout of your Poster, update the content of your Poster, and update your links and image.
- The links under the thumbnail of your Poster allow you to either view your Poster or delete it.
Locating Your Poster
- To retrieve a Poster, go to the Web Poster Wizard home page. In the bottom right-hand corner there is a Search for Posters and Worksheets section. Use the drop-down menu to select by which item you would like to search. Then enter the corresponding information in the text field. Click the Search button to retrieve the results.
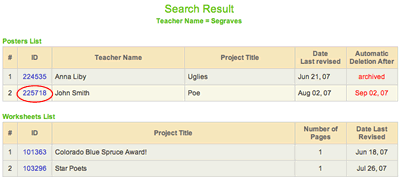
- If you have forgotten your Poster ID and need it to edit your Poster, youcan search by your teacher’s last name or by the Class Code.

- On the results page you can find your Poster and its ID number.
|