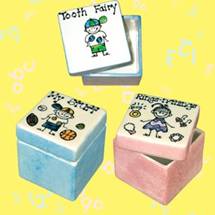
| Sample Lesson Plan: Slab Box for Ceramics 1, Grade 9 |

|
 |
|
California State Standard: Visual Arts 1.0 Artistic Perception 1.4 Analyze and describe how the composition of a work of art is affected by the use of a particular principle of design. 2.0 Creative Expression 2.1 Solve a visual arts problem that involves the effective use of the elements of art and the principles of design. 2.2 Prepare a portfolio of original two- and three- dimensional works of art that reflect refined craftsmanship and technical skills. Lesson Objective: Still life study (different kinds of boxes) Students will: -Develop hand- eye coordination. -Create a box using the slab method. -Understand the basic methods of additive and subtractive sculpting methods -Show mastery and craftsmanship in using clay -Be able to decide whether to use under glaze or glaze for creative decorative purposes. Assessments to be used: Finished sculptures are individually critiqued and graded. Assessment with the aid of a rubric Lesson Delivery: 1-Introduction: As students enter the classroom, they should have model of a box, or researched pictures of boxes or brainstormed and sketched out a box that are favored by them. After they are greeted, they are reminded to take out their clay, tools (sponge, modeling tools, needle… etc), slip, aprons, and get their water ready to start work. 2-Instruction: We start our sculpture today by drawing the different sides of the box’s dimensions, and cutting out the patterns for these sides. Then we use a rolling pin and wooden slates to roll out even slabs of clay. After that we start cutting out the sides of the box. Since clay shrinks by 12% we have to cut the dimensions of the sides a little big bigger to we can leave room for shrinkage. We use either the butt joint or mitter joint to attach 2 sides together. We always have to score and slip the edges before joining the. After we press those joints together we need to add a thin coin that we smooth over the seams of the sides. The reason we do this is to reinforce that joint. After you join all 4 sides to the base, we then add the top, and smooth its edges around all 4 sides. We bring a knife, and cut about 1½ to 2 inches from the top all around the sides. We lift that top off, and we coil the inside of that top to reinforce that joint. We need to add an edge to the inside of the box so when it’s completed and glazed, the lid doesn’t slide off. Then we bring our sponge and smooth it from the outside and the inside to make it “clean looking”. We let it air dry slowly. The student has the option of either adding a surface design, under glazing, or bisque fire it, and then glaze it. During the instruction I always pause after every 2 or 3 ideas that I am presenting to the students a couple of seconds and ask them questions to see their level of understanding. 3-Check for understanding: Before the students begin to work they are asked questions that would show the level of their understanding of the instruction that was given to them. As they are working I go around and visually check if they are demonstrating proficiently all the proper ways and techniques that need to be used, and help would be offered to them as needed. 4-Assessment: Accurate representation of the box or picture of it that they presented. Neatness, presentation, composition and execution are graded. 5-Closure: We will have 2 full cycles to finish this assignment. Reflection: --Cutting out the slabs may be the only thing they might finish the first day. --Show them how to start their projects, even though not all students need the same method of instruction -- I need to make sure I have enough clay and glaze for the students to work efficiently. Students enjoy working with this lesson and they compete in showing their competitive creative spirit. Please feel free to use it in your own classroom! |